GitLab Self-Hosted Setup
Squash has native support for self-hosted GitLab instances, all Squash features are available in this integration.
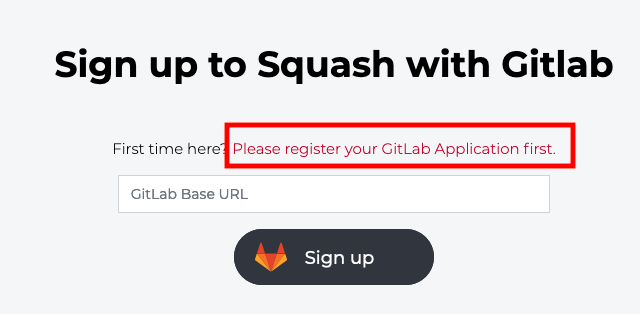
To get start first go to the Squash Sign up page, click on "Signup with GitLab" and then "GitLab Self-hosted" in the next page.
Then click on the highlighted link to setup your GitLab access:
The next step is to register Squash within your GitLab instance by following the steps below.
Registering an application in GitLab
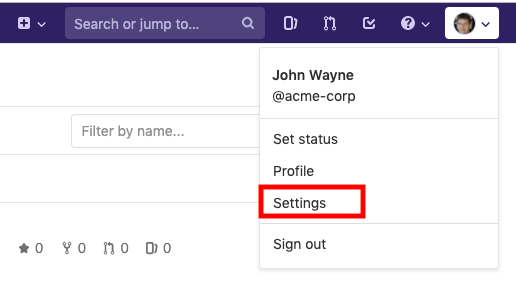
Go to your GitLab instance and click on your username avatar and then click on "Settings":
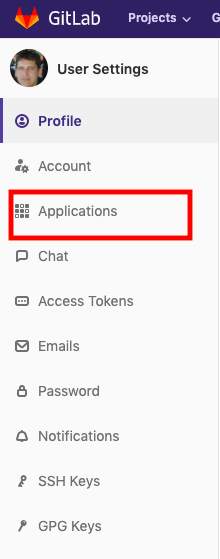
Then on the next page click on Applications:
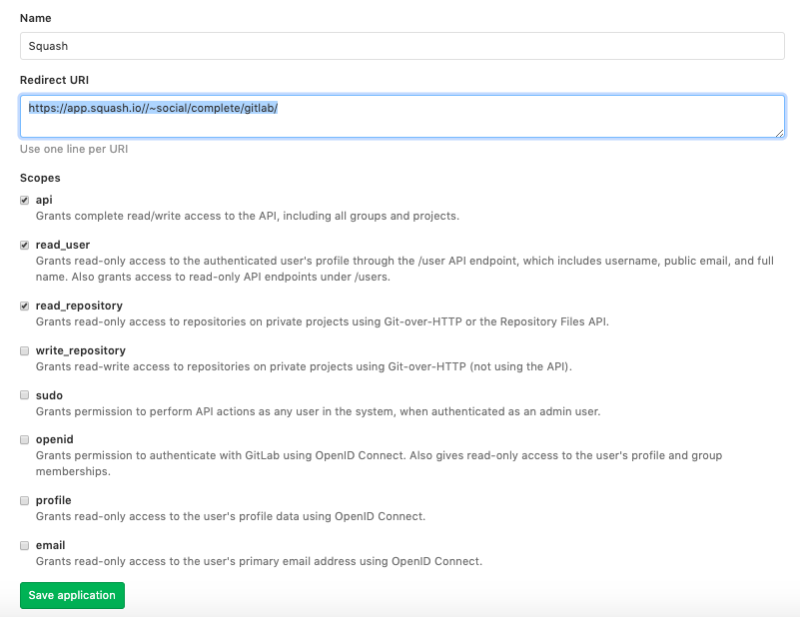
Then populate the next form as follows:
- Name: use something descriptive like "Squash"
- Redirect URI: this is going to be
https://app.squash.io//~social/complete/gitlab/- It's important to keep all double slashes as is
- For the scopes, check only the following boxes: api, read_user, read_repository
Then click on "Save Application".
On the next page you will see a form like the one below. You will need this information in order to finish the signup process on Squash.

Finish the Squash signup
Now back on Squash, fill out the page below as follows:
- GitLab Base URL: this is the full public address of your GitLab instance, including the protocol part.
- Application ID: use the same information from the GitLab application you just created above
- Secret: also from the same GitLab application created above.
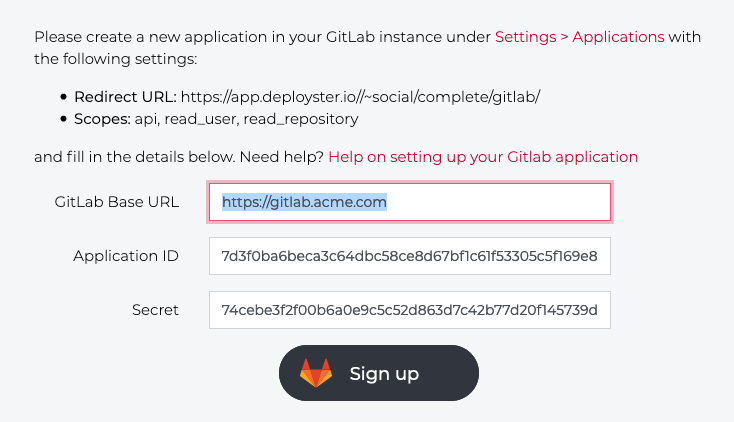
Now click on "Sign up" and Squash will redirect you to your GitLab instance to finish the process.